
Welcome to “The Essential Guide to Going Solar in 2024 in California.”
As a California homeowner, whether you’re considering solar due to the mandate for new builds or exploring it for your current home, this decision can benefit your finances, lifestyle, and the planet. This guide will help you navigate solar under the new California policies in 2024
Determine if solar fits you under the new NEM 3.0 policies for your current home
Navigate Title 24 mandates for solar in new builds and ADUs
Choose between hiring an installer or taking the DIY route to save money
Select the right solar equipment from trustworthy brands
Evaluate financing options
Is Solar Right for Your Home?
Most commonly, people start researching solar either because they have an off-grid cabin that needs power, or they’re fed up with high grid utility costs.
While contributing to green energy is appealing, the potential to save money is often the biggest factor in a grid-tied homeowner’s decision to go solar.. For off-grid setups, solar is usually the only viable option if you want to power appliances in a remote area.
You’ve probably heard mixed opinions on solar—whether from Reddit, neighbors, or stories from friends—but the reality is that if your home qualifies for solar and meets ideal conditions, it’s a no-brainer, especially in California.
Unfortunately, poor sales practices and subpar contracting have left some homeowners dissatisfied with their solar investment.
These problems commonly arise when homes aren’t well-suited for solar or when customers overpay for an undersized system due to a lack of knowledge.
Our goal is to help you make a sound investment and become an advocate for solar. By reading this guide, you’ll be empowered to make an informed decision on going solar and understand the key steps to a successful installation that maximizes your return on investment.
“People that research solar first gain and additional 27% in savings”

Key Considerations for Solar
Solar Irradiance
First, evaluate the solar irradiance in your area—how much sunshine is available for conversion into energy. This involves assessing the orientation of your roof, available space, and any potential shading from trees or nearby structures.
A solar designer can calculate the sun hours your property receives throughout the year using sophisticated software, factoring in shade, roof pitch, angle to the sun, and regional weather patterns. California generally provides excellent sun hours, even in northern areas with occasional snow.
However, if you have significant shading from trees and don’t want to remove them, solar may not be a sound investment. Simply put, shade is a solar killer. Anyone telling you otherwise is lying. There are situations where seasonal shade is acceptable, but this depends on several factors we’ll cover later. So if this applies to you, don’t give up just yet, keep reading.
You might be thinking, "that's great, but I really want to do it on the ground!"
Ground mounts are a great option too, allowing you to install your solar panels away from trees and shade, but that flexibility comes with additional costs. You’ll also need to ensure you have enough space for a ground mount.
When considering this option, be aware of your property line setbacks. It’s an often-overlooked issue—you might think you have plenty of room in your backyard, only to discover during the permitting process that you need to be 50 feet away from your property line, which you hadn’t anticipated. Each jurisdiction and county has its own setback requirements for ground-mounted solar, so it’s crucial to check with your local authorities before moving forward.

Roof and ground mounted solar arrays each have their own pros and cons, so it’s important to work with a solar advisor who is knowledgeable about both options. Depending on your unique property layout, they can help guide you in making the most informed decision.
Energy Consumption
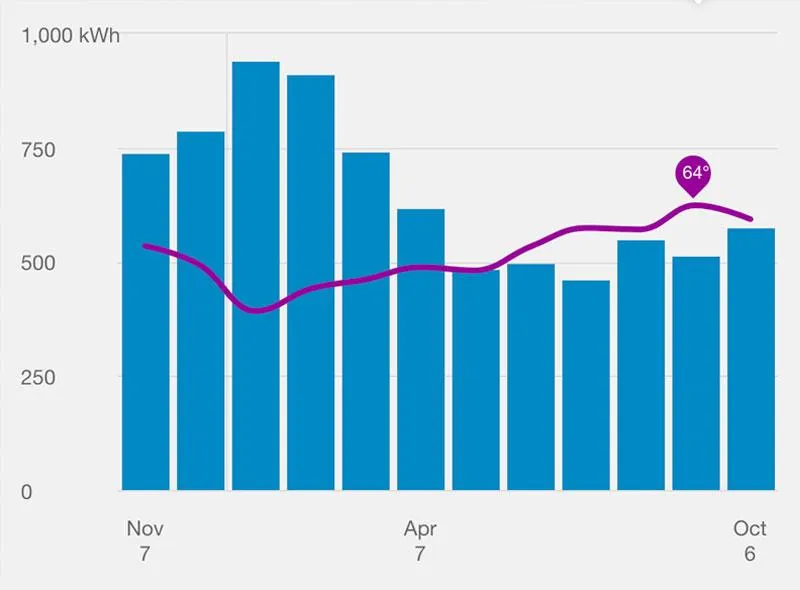
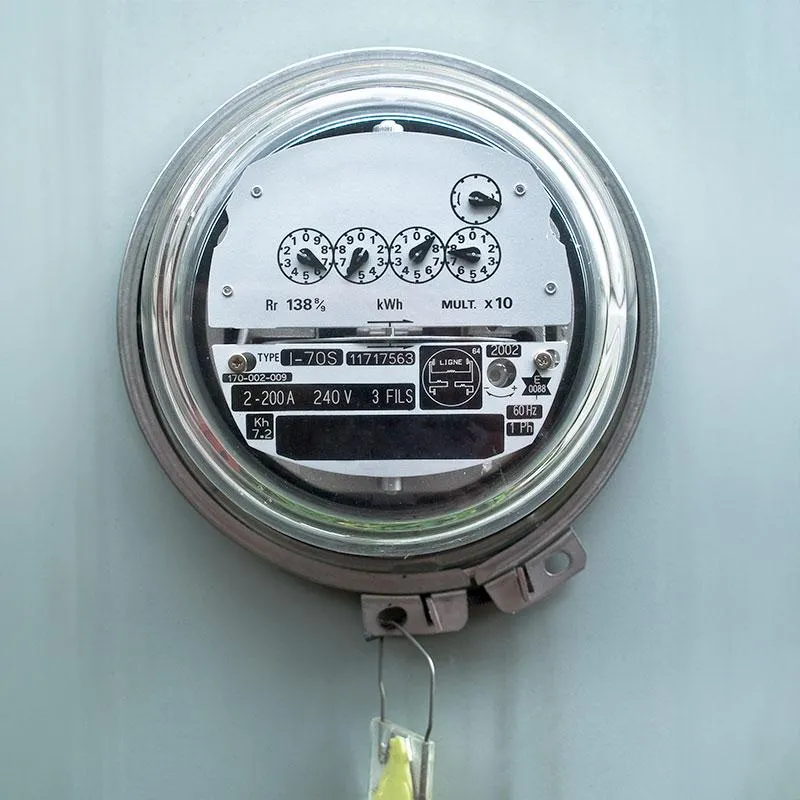
Your energy consumption is another crucial factor. Everyone uses power differently, so it’s important to understand your usage patterns. Utilities like SCE, SDGE, and Pacific Power provide monthly usage graphs on your bill, while PG&E customers may need to log into their customer portal to access this information.
Gathering your last 12 months of energy usage (kWh) is essential to assess how your solar system will perform month by month rather than just annually. Energy usage varies throughout the seasons, so it’s important to size your system correctly to maximize your return on investment. An experienced solar advisor can help you compare your monthly solar production to your home usage and adjust the system accordingly.
Pro Tip: Optimal Solar Offset
Typically, aiming for a solar energy offset of about 90-95% annually is the sweet spot for maximizing your investment. Overproducing energy isn’t financially wise since compensation for excess energy is minimal. During your consultation, discuss any future home improvements that may increase your energy needs, such as adding an electric vehicle, converting to electric heating, or installing a sauna. Planning for a higher energy output from the start will set you up for success.
Be Wary of Undersized Systems
Be cautious of solar representatives who may propose an undersized system to make the cost appear more attractive. While a smaller setup may appear more cost-effective up front, it could result in insufficient energy production to meet your needs.
When comparing quotes, be skeptical of any that seem significantly lower than others. Deals that seem too good to be true often are. It’s more important to compare the overall system size in kilowatts (kW) rather than just the number of panels, as energy output can vary significantly. A good solar consultant will guide you through this process to ensure your system is appropriately sized and meets your energy demands.
There are exceptions, of course. Sometimes a system that covers 50-75% of your energy needs might actually offer the highest return on investment, depending on how the solar production aligns with your energy usage throughout the year and also what net metering programs your utility offers. Smaller systems aren’t always a bad thing—it’s all about setting the right expectations and understanding the system before making a decision. Working with a trusted solar advisor can help ensure you make the best choice for your situation.
Does the angle and orientation of my solar panels affect energy production throughout the year?
The angle and orientation of your solar panels are crucial for optimizing energy production. Panels that are tilted at an angle close to your geographic latitude tend to perform best year-round, as this angle maximizes exposure to the sun. Additionally, the orientation of your panels—ideally facing true south in the Northern Hemisphere—can significantly influence the amount of sunlight they capture throughout the day. However, if your roof orientation isn’t optimal, adjustments can be made either through panel tilt or by installing a ground-mounted system. Seasonal changes in the sun’s position mean that optimizing these factors is key to maintaining consistent energy production across different times of the year.
What do I need to know about the permitting process for installing solar panels?
The permitting process for installing solar panels can be complex and varies widely depending on your location. Key factors include local building codes, zoning laws, and homeowner association (HOA) rules. For ground-mounted systems, setbacks from property lines and other structures are common requirements. Roof-mounted systems may need structural assessments to ensure the roof can support the additional weight of solar panels. The timeline for securing permits can also vary, so it’s essential to work with a solar provider familiar with local regulations. Learning about these requirements can help you avoid delays and unexpected costs during the installation process. Ensure that the company you choose, whether it’s a turnkey provider or an online kit supplier, has a strong internal permitting department to assist you in obtaining the necessary approvals for your solar installation.
How can future energy needs impact the size and design of mysolar system?
Anticipating future energy needs is critical when sizing and designing your solar system. If you plan to get energy-intensive appliances like electric vehicles, a hot tub, or an electric heating system, these will increase your energy consumption. It’s wise to account for these potential changes during the initial system design to avoid the need for costly upgrades later. Additionally, considering possible changes in family size or lifestyle that might alter your energy usage patterns can help ensure your solar system remains adequate for your needs. A well-designed system that considers future growth or downsizing will offer the best long-term value and performance.
NEM 3.0: Understanding the Changes:
You might have heard that solar doesn’t make sense in California anymore because utilities no longer offer substantial paybacks for the energy you send back to the grid. Here’s the scoop: Under the previous NEM 2.0 program, utilities like PG&E, SCE, and SDGE would give you nearly a 1:1 credit for any excess energy you produced and sent back to the grid. This system allowed homeowners to bank credits during sunny months and use them at night or during the winter when solar production was lower, often resulting in a net-zero utility bill at the end of the year. It was a great deal.
However, under the new NEM 3.0 policy, utilities now only offer a fraction of that credit—typically just a few cents per kWh. So instead of getting a 40-cent credit for every kWh you produce, you’re now only getting about 5 cents. This has led many to question whether solar is still worth it, especially without the benefit of those generous credits.
Even utilities that are not regulated by the California Utility Commission, like Sacramento’s SMUD and Northern California’s Pacific Power, have moved away from attractive solar net metering options for homeowners.
But don’t dismiss solar just yet. Batteries, once considered an expensive luxury, have become much more affordable in recent years. With utility rates on the rise, storing your own energy with a battery system and using it at night can provide a strong return on investment. In California, where energy costs are the second highest in the nation after Hawaii (and four times higher than the U.S. average), batteries can pay for themselves in about five years. Given that most come with a 15-year warranty, it’s a no-brainer. Instead of pouring money into utility bills, you’re investing in a battery system and gaining energy independence.
There are still a few companies that offer a 1:1 exchange for the excess solar power like LADWP in L.A. In such areas a battery backup solution still looks very attractive in light of rising utility rates and the lowered cost of batteries.
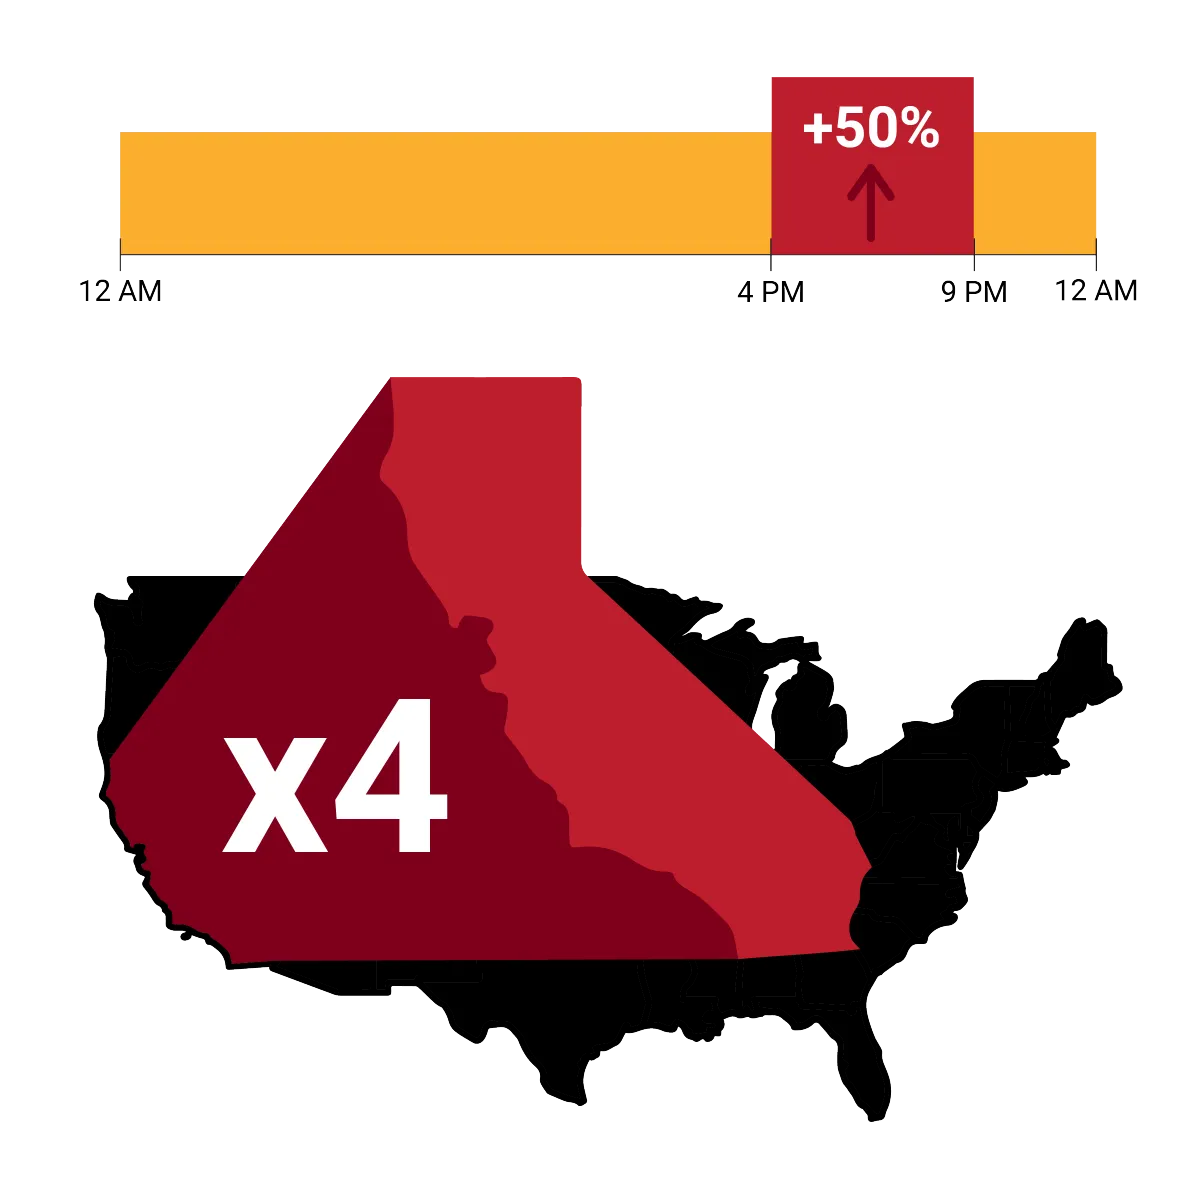
The illustration below explains why electricity costs in California are four times higher than the national average. Beyond just the higher cost per kWh, there’s also the impact of time-of-use pricing for most homeowners. Rates increase by 50% during peak hours when you typically use the most power. Having a battery system to draw energy from during these peak hours can save you thousands of dollars annually.
Will utilities ever revert to better net metering rates like those in NEM 2.0?
It is highly unlikely that utilities will revert to the more favorable net metering rates like those seen under NEM 2.0. Over the past 20 years, no utility has returned to offering higher credits once they have reduced them. The trend has been towards less generous net metering policies, so it's best to plan for the current conditions and explore options like battery storage to maximize your investment.
Why are utilities making grid-tied solar systems less attractive and pushing for battery solutions?
Utilities are making grid-tied systems less attractive for several reasons. One key factor is profitability; by reducing the credits offered for excess solar energy, utilities can reduce their payouts to customers. Additionally, there's the issue of grid saturation. During peak solar production hours, the grid can become overwhelmed with excess energy, leading to the need for costly infrastructure upgrades. By encouraging battery solutions, utilities can alleviate some of these pressures, allowing homeowners to store and use their energy rather than sending it back to the grid.
If I already have solar under NEM 2.0, can I expand my system without losing my current net metering benefits?
Yes, you can expand your existing solar system under NEM 2.0 without losing your current net metering benefits, but there is a limit. You are allowed to increase your system size by up to 1 kW, which typically equates to about 2-3 additional panels. If you exceed this 1 kW limit, you may be forced to transition to NEM 3.0, which offers significantly less favorable terms.
What Are My Installation Options?
Turnkey Solutions:
Most people are familiar with turnkey solar solutions, because such solution providers often use door-to-door sales tactics. Their salespeople might even claim to be part of the utility company or some other agency conducting research in your area.
The appeal of turnkey solar is its simplicity for homeowners: sign some paperwork, pay no upfront costs, and soon enough, solar panels are on your roof.
However, there are some drawbacks to this approach. After signing the paperwork, you might find it challenging to get in touch with your salesperson. High salesperson turnover rates at turnkey solar providers mean you are often dealing with someone who has limited experience, and as a result your system may not be customized to meet your true needs and goals.

Turnkey solutions have their place, and many people have had positive experiences with them, often praising the value of solar. However, much like buying a car from a dealership, the salesperson’s interests may not always align with the homeowner’s. This is largely to blame on the commission only compensation within turnkey organizations. It’s important to be aware of this, but it doesn’t mean all turnkey salespeople and installers are bad. Turnkey options offer convenience and ease of installation, which can be appealing.
That said, it’s worth considering alternative ways to go solar that might better suit your needs. Talk with a turnkey advisor, use the information from this guide to assess the value of the company, and always trust your instincts.
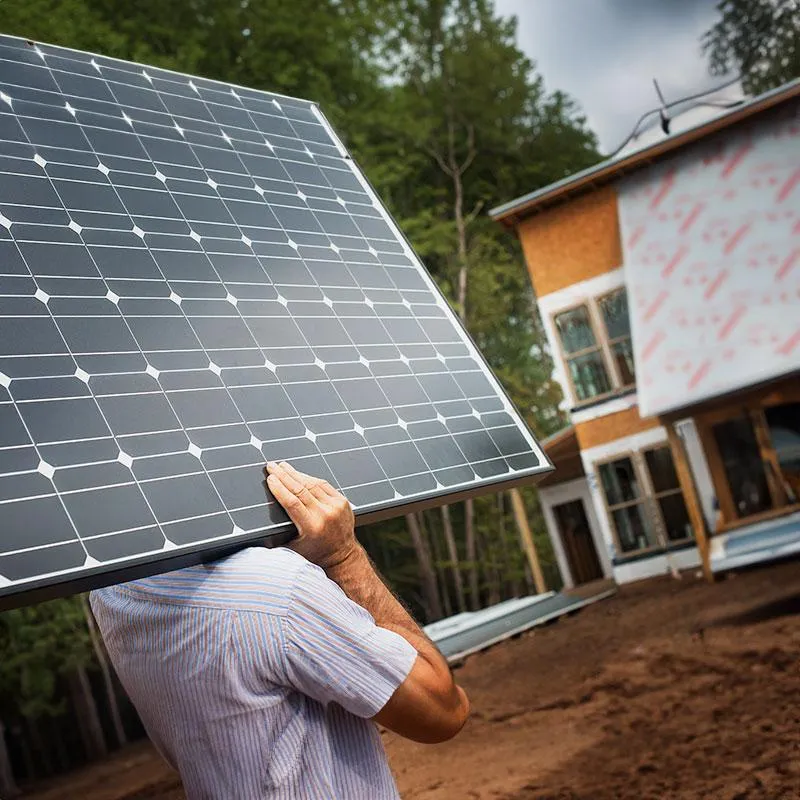
DIY Solar:
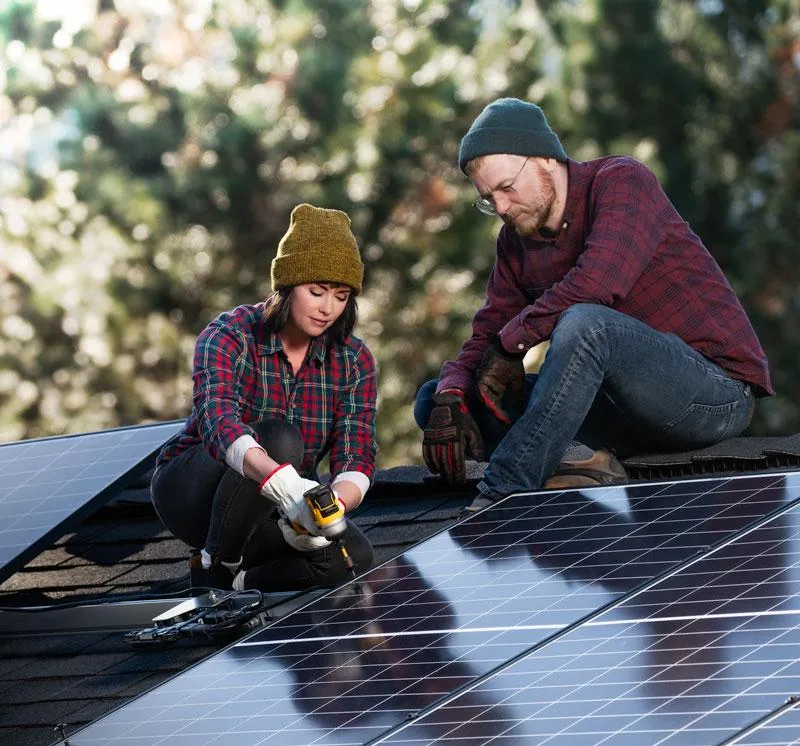
DIY grid-tied solar projects have been rising in popularity over the last 20 years. Despite how it sounds, DIY doesn’t mean the homeowner does ALL the work themselves. Instead, it means being more involved in the process. For instance, you could take on simpler tasks like installing the hardware on the roof yourself, and then hire an electrician to connect the system to your main 200-amp panel, or vice versa.

Additionally, requirements like plan sets, permits, and utility interconnection authorization can be handled through purchased services, often resulting in lower costs compared to the traditional turnkey approach.
The primary advantage of a DIY approach is the transparency in the process, which translates to more savings for you.
By taking on more of the project yourself, you can get the same top-tier, industry-standard equipment that turnkey providers use at a lower overall cost. Even if you opt to hire a local contractor for the entire installation and have a solar kit delivered directly to your home, you can still save an average of 23% compared to a traditional turnkey solution.
Managing the project yourself also gives you greater control and transparency, allowing you to tailor the installation to your specific needs and maximizing your return on investment.
Managing the project yourself also gives you greater control , allowing you to tailor the installation to your specific needs and maximizing your return on investment.The type of homeowner who benefits most from a DIY approach is someone who works in the trades or has a family member or friend with trade experience—like a father-in-law, brother, aunt, or close friend. It also appeals to DIY enthusiasts who want to save more on their project and enjoy the sense of accomplishment that comes with completing home improvements themselves. And hey, it doesn’t hurt if you can rope in some free labor from friends and family—just remember to pay them in pizza and cold beers! 😉
Combining the Best of Both Worlds:
If you’re interested in the savings and control of a DIY approach but don’t know anyone with trades experience, combining the best of both worlds might be the perfect solution. You can purchase a DIY solar kit, have it shipped to your home, and then work with a local contractor to handle the installation.
Many customers choose to install the hardware themselves and hire an electrician for the connections, while others outsource the entire project to a trusted local contractor. There’s no wrong way to install your solar when you approach with a DIY mindset.
Quick plug: At GoGreen Solar, we offer comprehensive support to help you create a top-tier solar kit delivered right to your driveway. We assist with obtaining plan sets for permits, getting your utility interconnection applications approved, and connecting you with a local contractor. This approach gives you full control over your energy system while avoiding the high costs of those turnkey providers. By combining a DIY approach with professional guidance, you can achieve substantial savings while ensuring your system is installed correctly and tailored to your needs.
At GoGreen Solar, we understand that solar energy is a smart choice for many homeowners when the circumstances are right. We’re here to help you determine if solar is a good fit for your home. Our commitment to transparency and honesty means you’ll have all the information you need to make an informed decision.
Learn how we’ve been supporting homeowners with a DIY solar approach for almost 20 years.
What about support with the DIY approach? That’s the advantage of choosing a vetted DIY solar provider with over 20 years of experience. GoGreen, along with its sister companies Unbound Solar and Alt-E, has a long track record in the DIY solar space, offering exceptional support before, during, and after installation. When you rely solely on turnkey providers, there’s no guarantee they’ll still be around in 5-10 years. Our teams have been here longer than most Gen Zers (2001), and we’re not going anywhere anytime soon.
Ultimately, the more you handle yourself, the more you save and the more you empower yourself. Even if you decide to purchase a kit and hire someone for the installation, you’ll still save more compared to traditional turnkey solutions. And if we determine that solar isn’t the best option for you, we’ll be upfront about it.
So, what’s the catch?
The catch is that you’ll need to invest a bit more time and effort into the process. However, the potential savings and increased control can make it well worth it. If you prefer a completely hands-off approach and are comfortable with the higher costs, a traditional turnkey solution might be a better fit. Just be sure to thoroughly research the installer you choose.
How to Navigate California's Title 24: Mandatory Solar for New Builds and ADUs
As of 2020, California requires all new home builds and Accessory Dwelling Units (ADUs) to meet specific energy efficiency goals, typically by adding solar panels to offset energy usage, as part of the state’s plan to achieve 90% renewable energy by 2035. While this initiative is well-intentioned, the cost often falls on homeowners, which can feel burdensome. For those seeking a more cost-effective way to comply, a DIY solar kit— installed either by yourself or a contractor—offers a more affordable solution. Many contractors already factor in solar costs for complete new home builds, but if you're adding an ADU, exploring DIY options can help you navigate these requirements more economically.
Pro-Tip: If you’re planning to add an ADU and considering a second meter—don’t. Installing a second meter can cost you around $15,000 and take up to nine months to complete. Instead, you’re better off installing a 50-100 amp sub-panel connected to your main panel, ideally running off a 200-amp service from the primary structure on the property.
What if you want to rent your ADU and have the tenant be responsible for their energy costs?
The cost of adding a new meter, which can range from $10,000 to $25,000, just doesn’t make sense. Instead, consider building out the solar system to handle the tenant’s energy usage and charge them an additional fixed cost. This way, not only will you save on your own energy bills and start seeing immediate savings from the utility, but you’ll also provide a backup power solution for your entire property. Overall, investing in a larger solar system is a much smarter choice for homeowners than installing a separate meter if you’re thinking about renting out an ADU.
But what if you just want the bare minimum requirements at the lowest cost?
First, you’ll need to determine the required solar capacity, which is typically around 30% of the estimated energy usage for the ADU or new build. This should be factored into your plan sets and system requirements, which you’ll need when working with a solar provider.
Choosing a DIY solar kit can significantly reduce costs under Title 24, whether you meet the minimum requirements or opt to upgrade the system for better savings and protection against utility rate hikes. If you hand the entire process over to a contractor, expect additional costs. However, by managing the purchase of a kit yourself or taking on some of the tasks, you’ll only be paying for the labor, making the mandatory requirement easier on your wallet.
There are many variables to consider when integrating solar with an ADU, and this guide only scratches the surface. For more detailed insights and customized free advice, feel free to speak with our ADU experts at GoGreen Solar, who can help point you in the right direction.
Equipment Guide:
We wouldn’t be doing our job if we didn’t talk about the best equipment on the market…
Component wars are indeed a real phenomenon in the solar industry, with different manufacturers boasting that their panels are the absolute best. But let’s be real—anyone who claims theirs is the only viable option might need a bit more schooling. The truth is, as long as you choose a Tier 1 product—like the ones we recommend listed below—you’ll be in good hands. Whether they’re assembled in the USA, Canada, or overseas, all Tier 1 solar panels come with a 25-year warranty and are built to last.
Solar Panels:
When selecting solar panels, it’s essential to choose high-quality, tier-one products designed for commercial and residential use. These are the same panels that most turnkey installers use, ensuring reliability and performance. Some panels are grossly overhyped and, in our experience, aren’t worth the extra cost of $1,000-$5,000 for your solar panel array when you can get a solid panel with a 25-year warranty from a reputable company that provides the same amount of power. Ultimately, it comes down to power output, reliability, and aesthetics.
Based on our decades of industry experience and our knowledge of manufacturers, we’ve narrowed our recommendations to the following:
Our Recommended Solar Panels:
• Q Cells
• Hyundai
• Solar4America
If you want more options, you can also consider the following reputable brands:
• Canadian Solar
• Jinko Solar
• SunPower
• Silfab Solar
• REC
• Longi
• JA Solar
The decision between China vs. USA-made solar panels should really only come into play if you prefer not to buy products from China, which we understand is important to some people. However, the idea that a Tier 1 solar panel from China is of lower quality is simply false.
What’s most important is to steer clear of cheap solar kits / components you find on websites like Amazon, Temu and Alibaba. No reputable distributor or installer uses the low-grade solar panels or components included in those kits.
Solar Inverter Brands: What You Need to Know
A solar inverter is a device that converts the direct current (DC) generated by your solar panels into the alternating current (AC) that your home uses. There are two main types of inverters: microinverters and string inverters.
Microinverters: Each solar panel has its own microinverter installed underneath it. If one microinverter has an issue, the rest of your system continues to operate, which improves reliability. Enphase is the leading brand of microinverters, offering a 25-year warranty to match the warranty of all the solar panels listed above. Another advantage is that you can easily add Enphase batteries during installation or later on if you decide to expand your system. Microinverters are also an excellent option if you’re planning a phased solar installation. They’re especially ideal for DIYers due to their easy expandability, not only for integrating Enphase’s battery system but also for seamlessly expanding your solar array with panels in the future.
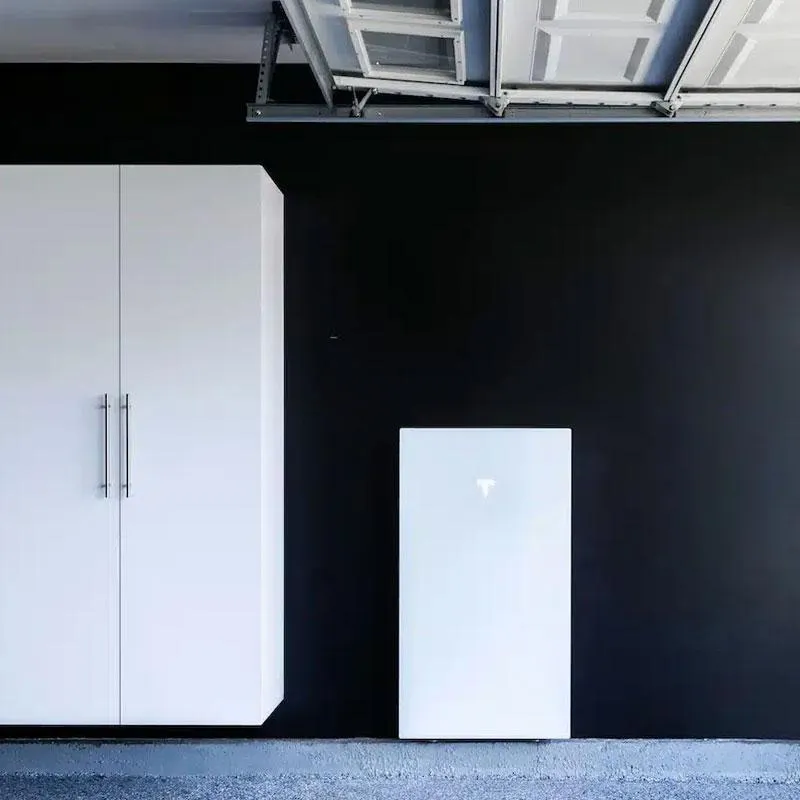
String Inverters: These are centralized inverters where multiple panels are connected to a single unit. Popular brands include SMA and SolarEdge. However, with the growing importance of battery storage, particularly in California, the Tesla Powerwall 3 is worth mentioning. This third-generation Powerwall not only offers a 13.5 kWh battery but also has a built-in inverter, making it a cost-effective and efficient option. It’s also designed to retrofit easily into existing systems, including those with Enphase microinverters, making it a versatile, DIY-friendly choice that’s popular among turnkey installers and homeowners alike.
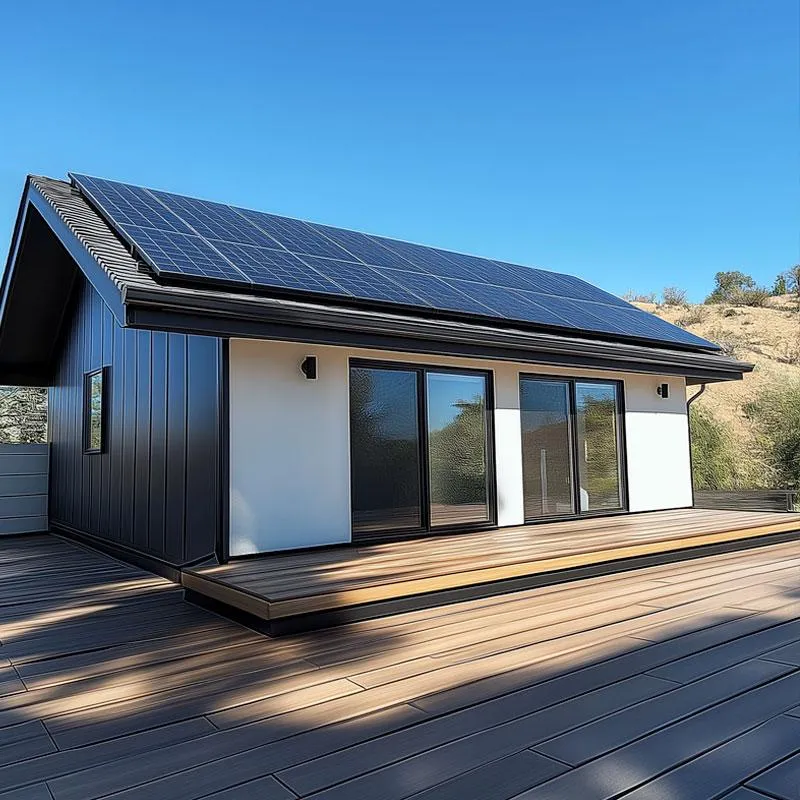
Racking Systems: Roof vs. Ground Mounts
Roof Mounts: Unirac and IronRidge are reliable options for roof mounts. Your main choice is between traditional flashing mounts, commonly used with asphalt shingles, and non-flashing options that use a special sealant to create a leak-proof installation. Non-flashing mounts offer flexibility, as they can be installed anywhere on the roof and are not restricted to being attached to trusses. If you choose traditional flashing, it’s crucial to stagger the mounts on your trusses to evenly distribute the weight and preserve your roof’s integrity. Although this practice is not always mandated by building departments, it is considered best practice and should ideally be detailed in your plan set for permitting. However, the level of guidance you get may vary depending on your planset provider.

If you have metal or cement shingles, there are specific racking solutions that need to be considered in the beginning stages of planning. Be sure to have that discussion with your advisor as early as possible. For DIYers this information is collected for the plan step phase, but usually is captured in the original quoting and design stage.
Clay Spanish Tile: Unlike cement tiles, traditional clay Spanish tile is too fragile for specialized mounting hardware. However, there is a workaround. Once the solar array is mapped out on the roof during the design process, the area where the panels will be installed is replaced with composition shingles. The benefit of this approach is that the panels sit slightly recessed, flush with the surrounding Spanish clay tiles, so the composition shingles are completely hidden from view. While this method involves additional cost, the aesthetics are clean and seamless, with the panels typically sitting about 3 inches above the roof.
Ground Mounts: Ground mounts offer flexibility, allowing you to position your solar array away from shaded areas. However, they do come with additional costs for materials like steel piping, cement, and trenching. Before deciding on a ground mount, be sure to check your property line setbacks with your local jurisdiction to avoid permitting issues. Ground mounts also require different racking systems and additional planning, which should be clearly outlined in your plan set.
Battery Storage: Making the Right Choice
Today’s market is flooded with new battery brands, but when it comes to reliability and safety, Lithium Iron Phosphate (LiFePO4) technology is the best choice. It’s crucial to choose a UL-listed battery from a reputable company. Avoid cheap alternatives that could lead to disappointment—or worse, safety hazards.
Recommended Battery Brands:
• Tesla Powerwall
• Enphase Ensemble
• Fortress Batteries
• Discover Batteries
• SimpliPhi Batteries
Tesla and Enphase work best for grid-tied solutions. Fortress excels in off-grid applications, but also offers strong grid-tied options. The new Tesla Powerwall 3.0 stands out for its affordability, user-friendly interface, and excellent specs, making it a top choice for those looking to integrate a DIY or retrofit-ready battery system.
What about panels that claim a higher efficiency grade?
There might be a slight improvement in efficiency with these panels, but the difference in power production is minimal compared to their competitors. In fact, adding just one extra standard panel to your array will generally give you more overall power at a much lower cost. The higher efficiency rating doesn’t necessarily equate to better quality; it’s often a sales tactic used to make the panels seem superior, when in reality, you’re just paying a premium for minimal gains. Many of these efficiency claims are made in lab conditions that may be biased to support the company’s marketing agenda. As mentioned before, sticking with reputable panel brands will serve you well, so don’t fall for the overpriced “high efficiency” hype.
I heard microinverters are better than string inverters. Is that true?
Both microinverters and string inverters have their advantages, and it’s a common misconception that microinverters significantly outperform string inverters, especially when it comes to shading. The actual efficiency gain with microinverters in shaded conditions is often minimal, making it difficult to justify the added cost in some cases.
One benefit of microinverters is the ability to monitor each panel individually, which can be useful for identifying specific issues. On the other hand, string inverters are typically installed at ground level, making them easier to service.
As the industry moves toward all-in-one solutions, string inverters are experiencing a resurgence. For example, Tesla’s Powerwall 3 includes an integrated inverter, simplifying both installation and maintenance. Enphase microinverters are also an excellent option if detailed panel-level monitoring is a priority for you.
Ultimately, both solutions are highly recommended, and it often comes down to personal preference—much like choosing between Coke and Pepsi. Whichever option you choose, you’ll be getting a high-quality product that meets your needs.
I don’t experience blackouts, so I don’t need a battery.
Even if blackouts aren’t an issue for you, a battery can still offer significant benefits, especially in California. Most utilities in the state charge much higher rates during peak hours, typically from 5-9 PM, depending on the season. By using stored battery power during these peak times, you can avoid those expensive rates now and in the future, as utility costs are likely to keep rising due to state regulations and inflation.
At the end of the day, utility companies are businesses—they need to generate profits for their shareholders and invest in constant upgrades (at least, that’s what they tell us). However, without competition, they often pass the costs of their financial mismanagement onto homeowners rather than optimizing their operations. This is a common issue with monopolies.
With solar power for the day and a battery for the night, you gain control over how you purchase and use your energy, whether you need it for emergency backup or not. Lithium batteries, which can last over 10 years, are becoming a smart investment, especially when the savings from using battery power during peak times can result in the system paying for itself in about five years. It’s not just about avoiding blackouts—it’s about making a financially savvy choice that offers long-term savings and energy independence.
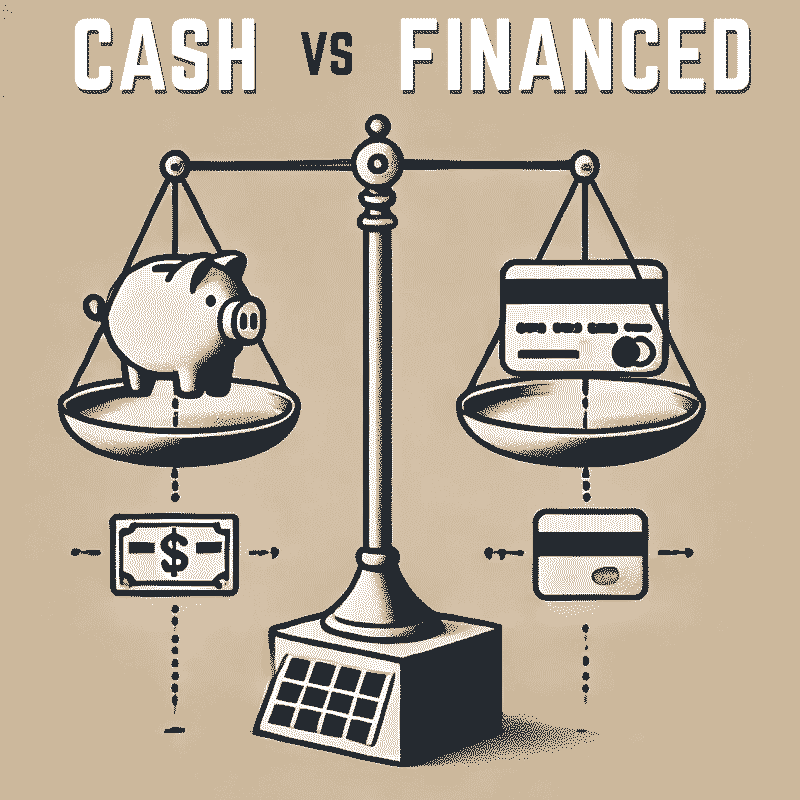
Financing Your Solar Project
In recent years, solar panel investments have become more budget-friendly, making them accessible to a wider range of homeowners. However, the key to maximizing your return on investment lies in how you choose to finance your solar project.
Whether you pay in cash, which involves a higher upfront cost but saves on utility bills over time, or opt for a financing plan that spreads out the costs, your approach will impact your long-term savings. Government incentives and local rebates also play a significant role in shaping your decision.
Solar Loans
Solar loans are a popular option, with terms ranging from 10 to 30 years, designed to keep monthly payments low. These loans typically allow early repayment without penalties. However, like mortgages, solar loan rates are influenced by the broader economic climate, so rising interest rates can affect your costs.
When considering a solar loan, be aware of hidden costs like origination fees. Sometimes a higher interest rate with lower fees can be more cost-effective than a lower rate with steep fees. Your decision should align with your financial goals—if keeping monthly payments low is a priority, you might also consider a solar lease or Power Purchase Agreement (PPA).
Leasing vs. Power Purchase Agreements (PPAs)
While these choices don’t work with a DIY approach, nor do they offer the highest return on investment, we’d be remiss to not cover them as some folks might benefit from a leasing over ownership option.
Leasing and PPAs allow you to benefit from solar energy without owning the equipment. With a lease, you rent the system; with a PPA, you buy the power generated at a lower rate than your utility charges.
PPAs are often a more advantageous way to go, because you pay only for the kilowatt-hours produced—and if your system underperforms, your cost is proportional. In contrast, a lease is a fixed agreement with no such adjustments. If you prefer the rent-not-own approach, a PPA is usually the better option.
The main drawback of PPAs and leasing has traditionally been the challenge of transferring ownership to a new homeowner, often resulting in significant headaches during the home-selling process. However, in recent years, PPAs have improved in terms of ease of transfer to new homeowners. Additionally, they can offer a lower cost for energy compared to the utility, making them a more attractive option than in the past.
Ownership and Incentives
In both leasing and PPAs, the installing company owns the equipment and claims any available tax credits. This might be ideal if you’re not tax liable and just want to pass the savings of the tax credit to lower your monthly electric bill. However, these savings are typically passed on to you through lower rates. Leasing has become more attractive in today’s economic climate, especially with high loan interest rates. Some leases even offer the option to purchase the system at the end of the term, providing a pathway to ownership if that fits your long-term goals.
Other Financing Options: cash payments, credit union loans, and home equity sharing.
Cash Payments: Paying in cash eliminates financing fees and interest charges but requires a significant upfront investment. As a tradeoff, it enables the highest return on your investment.
Credit Union Loans: Loans from local credit unions may have shorter terms (2-7 years), leading to higher monthly payments but often without origination fees. Interest rates depend on your creditworthiness, and while extended terms are rare, they are occasionally available through partnerships with solar companies.
Home Equity Sharing: A newer option gaining traction, home equity sharing allows you to leverage your home’s equity to fund solar installation without upfront costs or monthly payments. Instead, you grant a portion of your equity to a bank or financial institution, which can be bought back over time or settled when the home is sold. This option is still limited in availability but can be appealing for homeowners looking to avoid traditional financing.

Final Takeaway:
Choosing the right financing option for your solar project is crucial for maximizing your investment. Whether you opt for a loan, lease, PPA, or an emerging solution like home equity sharing, each path has its own set of benefits and considerations. At GoGreen Solar, we’re here to help you navigate these options and find the best fit for your financial situation and energy goals. Reach out to us for personalized guidance and explore the full range of possibilities for financing your solar installation.
At the end of the day, you have to pay for your power—your choice is whether you want to make monthly payments towards owning a solar system, which will eventually pay itself off, or continue renting your power from the utility company indefinitely. Renting means dealing with inflation and rate hikes that will keep driving up your energy costs for as long as you live. Why not invest that money into your home and benefit from a 30% tax credit in the process?
The best approach is to work with a reliable solar company like GoGreen Solar to get a custom design and transparent savings report. This will give you all the facts you need to make an informed and confident decision. There’s no cost for a free assessment—just a short time to answer some questions and discuss your goals over the phone. The rest is up to you.